Posted on 26th August 2011
Installing Front Hub Ball Joints
by Mike Kearney
Seven’s Service Shop Manager
Items you will need for one car:
- Parts
- (2) GSJ0166 genuine or GSJ0166E aftermarket
Ball Joint Repair Kit (each does one side)
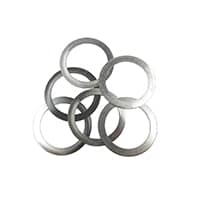
- (1) 2A4242 Ball Joint Shim Kit
- Chassis Grease
- Tools
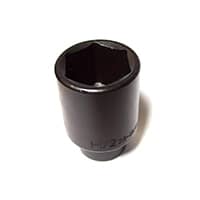
- 1-1/2" deep half-inch drive socket
- Small chisel
- Medium Hammer
- 1/4" open end wrench for zerk fittings
- Vise
We get calls all the time on how to install classic Mini ball joints in the front hubs. I have personally seen several very scary jobs done where the pin caps were not fully tightened, a hazardous situation.
The top and bottom ball joints are almost identical, with one exception: the bottom ball joint has a spring set into a recess in the hub that helps keep the load on the ball joint. For assembly purposes, I like to start by doing the top ball joint. If a new hub is being used, as supplied in purchases of a Cooper S disc brake kit SBR0059E, a quick cleaning of the bare hub is all you need to do. If replacing ball joints on existing used hubs, it will be necessary to do a complete and thorough cleaning of the old hub.
First, take off the existing ball joints. With a hammer and small chisel, knock down the lock tab off the top cap of the ball joint. Using the deep 1½” socket remove the top cap, then the ball joint and removable seat from the hub, then take off the old shims, remove the zerk fitting, then the lock tab, and save the old shims for now.
Assembly
After cleaning the hub. it is time to start re-assembly:
- Hold the hub in a vise (this is necessary to properly tighten the ball joint caps)
- Starting with the top ball joint, install the lock tab and zerk fitting on the hub.
- The ball joints will need to be adjusted to set the pre-load. This is sort of a “by-feel” procedure, with no real specification, but this is how I have done it for 40 years:
- The ball joint kit typically comes with six shims of different thicknesses, two of each. Every hub is different, so I start by putting one shim of each size on top of the lock tab and assembling the seat, ball joint, and cap with some kind of chassis grease. You never get a perfect fit on the first try so the joint will either be loose or locked up. Let’s say the ball joint is too loose. This will require removing shims until you get the correct load. I like to adjust the load so the ball joint is too tight, so that it takes a good amount of force to move it side to side. It will be about right when you can’t really move the pin around with your bare fingers, but you can still do so with a gloved hand. Then take the thinnest remaining shim out and torque the top cap to around 75 ft. pounds. This should be a tight but correctly-adjusted ball joint.
- Last step is to bend over the lock tab to finish the job.
To assemble the lower ball joint, repeat the above steps with the spring not in place. After you have the ball joint adjusted with proper load you can then add the spring under the seat as part of final assembly.
In either case, if any pin remains too tight, then you can add clearance by reusing some of the used shims off your old hubs, or adding the special 2A4240-30 thick shims and repeating the procedure above until a good fit is achieved.
To see this article in PDF format, please click here.
Questions or comments about this article? Please don't hesitate to contact our Classic Mini experts!

Price: $25.95
View
21.9500
Pending Warehouse Check

Price: $6.50
View
Pending Warehouse Check

Price: $3.50
View
Pending Warehouse Check

Price: $1.95
View
Pending Warehouse Check

Price: $28.50
View
23.9500
Pending Warehouse Check

Price: $41.95
View
31.0000
Pending Warehouse Check

Price: $62.95
View
Pending Warehouse Check

Price: $939.95
View
Pending Warehouse Check